Micro:bit - Getting Started
The BBC micro:bit is a tiny computer that you can use to create all kinds of projects from robots to musical instruments – the possibilities are endless. It can be coded from any web browser in Blocks, Javascript, Python, Scratch and more; no software required. Micro:bit is widely used in schools around the world, from Finland and Iceland to Singapore and Sri Lanka. Let’s take a look at the features that you can use in your designs:
- 25 red LED lights that can flash messages.
- Two programmable buttons (A and B) that can be used to tell the micro:bit when to start and stop things.
- 21 Physical input/output connection pins.
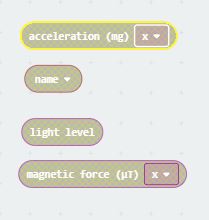
- A temperature sensor to measure temperature.
- An accelerometer to detect motion.
- A magnetometer to tell you which direction you’re heading in.
- A radio and a Bluetooth Low Energy connection to interact with other devices.
- A USB interface

Basic Parts
Let’s examine what each of the parts do.
LEDs

LED stands for Light Emitting Diode. The micro:bit has 25 individually-programmable LEDs, arrange in a 5 by 5 pattern, allowing you to display text, numbers, and images.
Buttons

There are two buttons on the front of the micro:bit (labelled A and B). You can detect when these buttons are pressed, allowing you to trigger code on the device.
Pins

There are 25 external connectors on the edge connector of the micro:bit, which we refer to as ‘pins’. Program motors, LEDs, or other electrical components with the pins, or connect extra sensors to control your code!
Temperature Sensor

This sensor allows the micro:bit to detect the current ambient temperature, in degrees Celsius.
Light Sensor

By reversing the LEDs of the screen to become an input, the LED screen works as a basic light sensor, allowing you to detect ambient light.
Accelerometer

An accelerometer measures the acceleration of your micro:bit; this component senses when the micro:bit is moved. It can also detect other actions, like shake, tilt, and free-fall.
Magnetometer

The compass detects the earth’s magnetic field, allowing you to detect which direction the micro:bit is facing. The compass has t calibrated before it can be used.
Radio

The radio feature allows you to communicate wirelessly between micro:bits. Use the radio to send messages to other micro:bits, build multiplayer games, and much more!
Bluetooth

A BLE (Bluetooth Low Energy) antenna allows the micro:bit to send and receive Bluetooth signals. This allows the micro:bit to wirelessly communicate with PCs, Phones, and Tablets, so you can control your phone from your micro:bit and send code wirelessly to your device from your phone!
USB interface

The USB interface allows you to connect the micro:bit to your computer via a micro-USB cable, which will power the device and allow you to download programs onto the micro:bit.
Micro:bit Accessories
Besides the micro:bit microcontroller, there are other accessories that you will be needing in the succeeding exercises and challenges.
Battery and Battery Holder

The battery holder and 2x AAA battery will power your micro:bit if it is not connected to the USB, so that you can bring your micro:bit anywhere.
USB Cable
This both powers your micro:bit when connected to the PC and act as a USB mass storage to be use for transferring your program from PC. On one end it is a USB type A to be connected to your PC and on other end it is a micro USB type B to be connected to your micro:bit.
Crocodile Clips

This connects your micro:bit to other components such as LED lights. On one end has a banana clip for easy connection to your micro:bit, and on other end it has crocodile clip for easy connection to other components. Convention is that black colored wires/clips are connected to GND and red colored wires/clips are connected to the 3 main pins (pin0, pin1 and pin2).
Jumper Wires

Also known as DuPont wires, these cables are connector at one end and usually used to connect components on a breadboard or a circuit module.
Speaker

This device produces sound by converting electrical signal into audio. We will use this on later chapter on music.
LED Light

This is a simple while LED light, that we will be using for some exercises and challenges. Make sure to add a resistor on on end so that it will not overheat.
Resistor

This component has resistance and reduces the current running through your wire. Effective use of this component will protect your micro:bit and your other components from damage due to overcurrent.
Light-Dependent Resistor (LDR)

This component has variable resistance depending on how much light it is capturing. The more light it gets, the lower the resistance.
Soil Moisture Sensor Module

This is a module that detects water moisture in soil and changes voltage depending on how much water it detects.
Traffic Light Module

This module has 3 LEDs, Red, Amber and Green, which you can powered on or off individually.
Passive Infrared Resistor (PIR) module

This module detects motion through the infrared (IR) light by detecting body heat through its sensors. It is passive since it doesnt emit IR but dependent on the infrared light emitted by the objects.
Powering your micro:bit
The microbit can be powered by either connecting it to the USB or by 2 AAA batteries thru the battery case.
Using the USB

- Make sure you have the usb adapter cable and a computer
- Connect the micro usb (type B) connector of the usb cable to the micro usb port of the microbit
- Connect the USB type A connector of your usb cable to the USB port of the computer
Using the 2x AAA Batteries

- Insert the 2 AAA batteries to the battery pack. Make sure the batteries are connected to the correct orientation.
- THen connect the JST connector of the battery case to the battery connector of the microbit. THe JST connector will connect only to the micro bit in only one way.
- When powering the microbit for the first time, it will automatically run the pre-loaded demo program. It will show you text and images, interact with the buttons and the accelerometer.
Now you will create your first micro:bit program; after that, well we’ve listed a few ideas but it’s really up to you.
What is a Computer Program?
Everything runs on code.
You can turn on your computer because code was written (programmed) to let you, code runs your mobile phone, and is the reason why your flashy coffee machine actually makes something when you press a button.
These tutorials will introduce core concepts of coding and show the interaction between hardware and software. By the end of these tutorials you will be able to program your BBC micro:bit to do lots of things: from calculators to games to a digital dice. You can then use this knowledge and the BBC micro:bit hardware to create anything you want – once you can code, you can create anything.
Once you have worked through the tutorials and tasks of this book you will be able to program a million and one things for your BBC Micro:bit and beyond. If you can come up with the idea then you can construct it from code.
This guide will leave you with enough knowledge to right your own programs, and with a level of understanding that allows you to go on to create anything.
Introduction to Block-Based Programming
What is block-based programming? Block-based programming, sometimes known as block-based coding, is coding within a programming language where instructions are mainly represented as blocks. The Micro:bit’s MakeCode Block Editor (based on Microsoft MakeCode) is a block-based programming language. It looks like this:

Micro:bit’s MakeCode Blocks Editor is a browser based block editor and can be used either online or offline. This is a graphical, drag and drop code editor, where coding blocks snap together like a jigsaw puzzle. There’s support for the main input and output functions of the BBC micro:bit, as well as standard programming constructs such as sequence, selection, repetition and variables. It also has a feature wherein blocks can be converted to JavaScript code and vice versa.
To go to the MakeCode Block Editor, use the link here.
Alternatively, if you have Windows 10 as OS, you can also install the MakeCode Blocks Editor by going to the Microsoft Store, search for MakeCode for micro:bit, and press install. It has the same functionality as the browser based editor. Here is the snapshot of the app.

Using the MakeCode Block Editor
Let’s go through the different parts of the editor. Here is the snapshot below:

- When clicked, you can create a new project, open your saved projects, open built-in examples, or import a hex file. A hex file is a micro:bit readable file that you will be uploading to your micro:bit to program it.

- Here you can switch between MakeCode block-based programming and JavaScript, which is a popular text-based programming that is mainly used for web development. As you progress with your coding skills on block-based programming, text-based programming is the next step, as this type of programming can support more complex features. BBC micro:bit both supports JavaScript and Python programming languages.
- This is where you select the blocks, arranged by functionality. Different block functions have different colors.
- This is the workspace, where you put your blocks and create a program.
- This is the simulator. This is where you can simulate what you code on the workspace. It is also interactive, you can press the buttons to simulate the action, or shake the virtual micro:bit.
- Here you can undo/redo and zoom in/out your workspace.
- Here you can change your program name, and save it as well.
- This is the download button, pressing this will download the hex file. THe arrow button besides the download button is to show or hide the simulator.
Types of Blocks
There are several types of blocks in MakeCode Block Editor, determined by the shape of the block.
- Event Block

These types of block indicate that the blocks inside this block will be executed upon an event. These blocks cannot be stacked on top, and without these blocks the other blocks cannot be executed.
- Stack Block

These types of block are the main commands, and can be stack on top of the other. They are usually placed inside the events block.
- Reporter Block
These types of block can hold a value, either a number or a string of characters. It reports a value, hence the name.
- C Blocks

These are blocks that do conditional statements. They look like the letter C in shape, hence the name.
Selecting Blocks

- Select a block category from the list on the left hand side of the page.
- Select a block from the selected category and drag it to the workspace area on the right.
- Snap new blocks onto existing blocks in the workspace area. As the new blocks are dragged into the workspace, the editor highlights the connecting parts of each block when they are in a valid position to snap to existing blocks.
Saving
Your code is automatically saved as you work, you can access your saved work by clicking on the Projects icon shown in the above image. To make your projects easier to find, it is always good practice to name your project in the space provided at the foot of the editor.
Downloading
In order to get your code onto a micro:bit, you must first download it. Towards the bottom left of the editor is a large download button, when you click this button the code in your workspace will be compiled as a HEX file and then downloaded to your computers default download folder.
Transferring A Program to the micro:bit
To tranfer a program, ensure your microbit is connected to your computer. In Explorer drag your file and drop it onto the microbit removable drive. As your code transfers to the microbit the orange power LED on the rear of the board will begin to flash, Once it stops flashing the transfer is finished and your program is ready.

Block-Based Programming Quick Tips
- To avoid overwriting your last program click on the Projects folder (top left) and start a new project. Then name your new project.
- Find the block you require in the menus and drag it and drop it into the workspace.
- Only blocks that are supposed to go together will be able to be slotted together in the workspace.
- To delete an unwanted block either; right click and select Delete Block, or pick up the block and drag it to the menu and drop it in the bin that appears.
- To duplicate a block, right click and select Duplicate Block.
Questions
- A ___________ is a pocket sized computer that you can make all sorts of projects like musical instruments or games.
- A ___________ can detect the direction the micro:bit is facing, like a compass.
- A micro:bit can be powered on by _____________________ and ___________________________.
- What are the 4 steps in coding the micro:bit. __________________, _______________, __________________ and ___________________.
- _______________________ is a coding with the programming language where instructions are represented by blocks.
- True or False. To get your code to the micro;bit, you must download it clicking the download button on the upper right side of teh editor.
- What is the difference between a block based programming and a text based programming?